

There are a dizzying number of ways to lace up boots, though most folks don’t deviate from the default scheme that arrives out the box. A fresh lacing technique can enhance both the functionality and style of your footwear. If you’re ready to lace up a new lease on your boot’s life, check out the curated list of techniques below.

The most basic of lacing methods. You probably do this one already without even thinking about it. It’s very simple to do, easy to adjust, and comfortable to wear.
- Start by going underneath the two bottom eyelets and come outward. Make sure the left and right laces are even in length.
- Thread one lace across and up one eyelet, going from under the eyelet, then out. Do the same for the opposite lace and repeat until you get to the top.
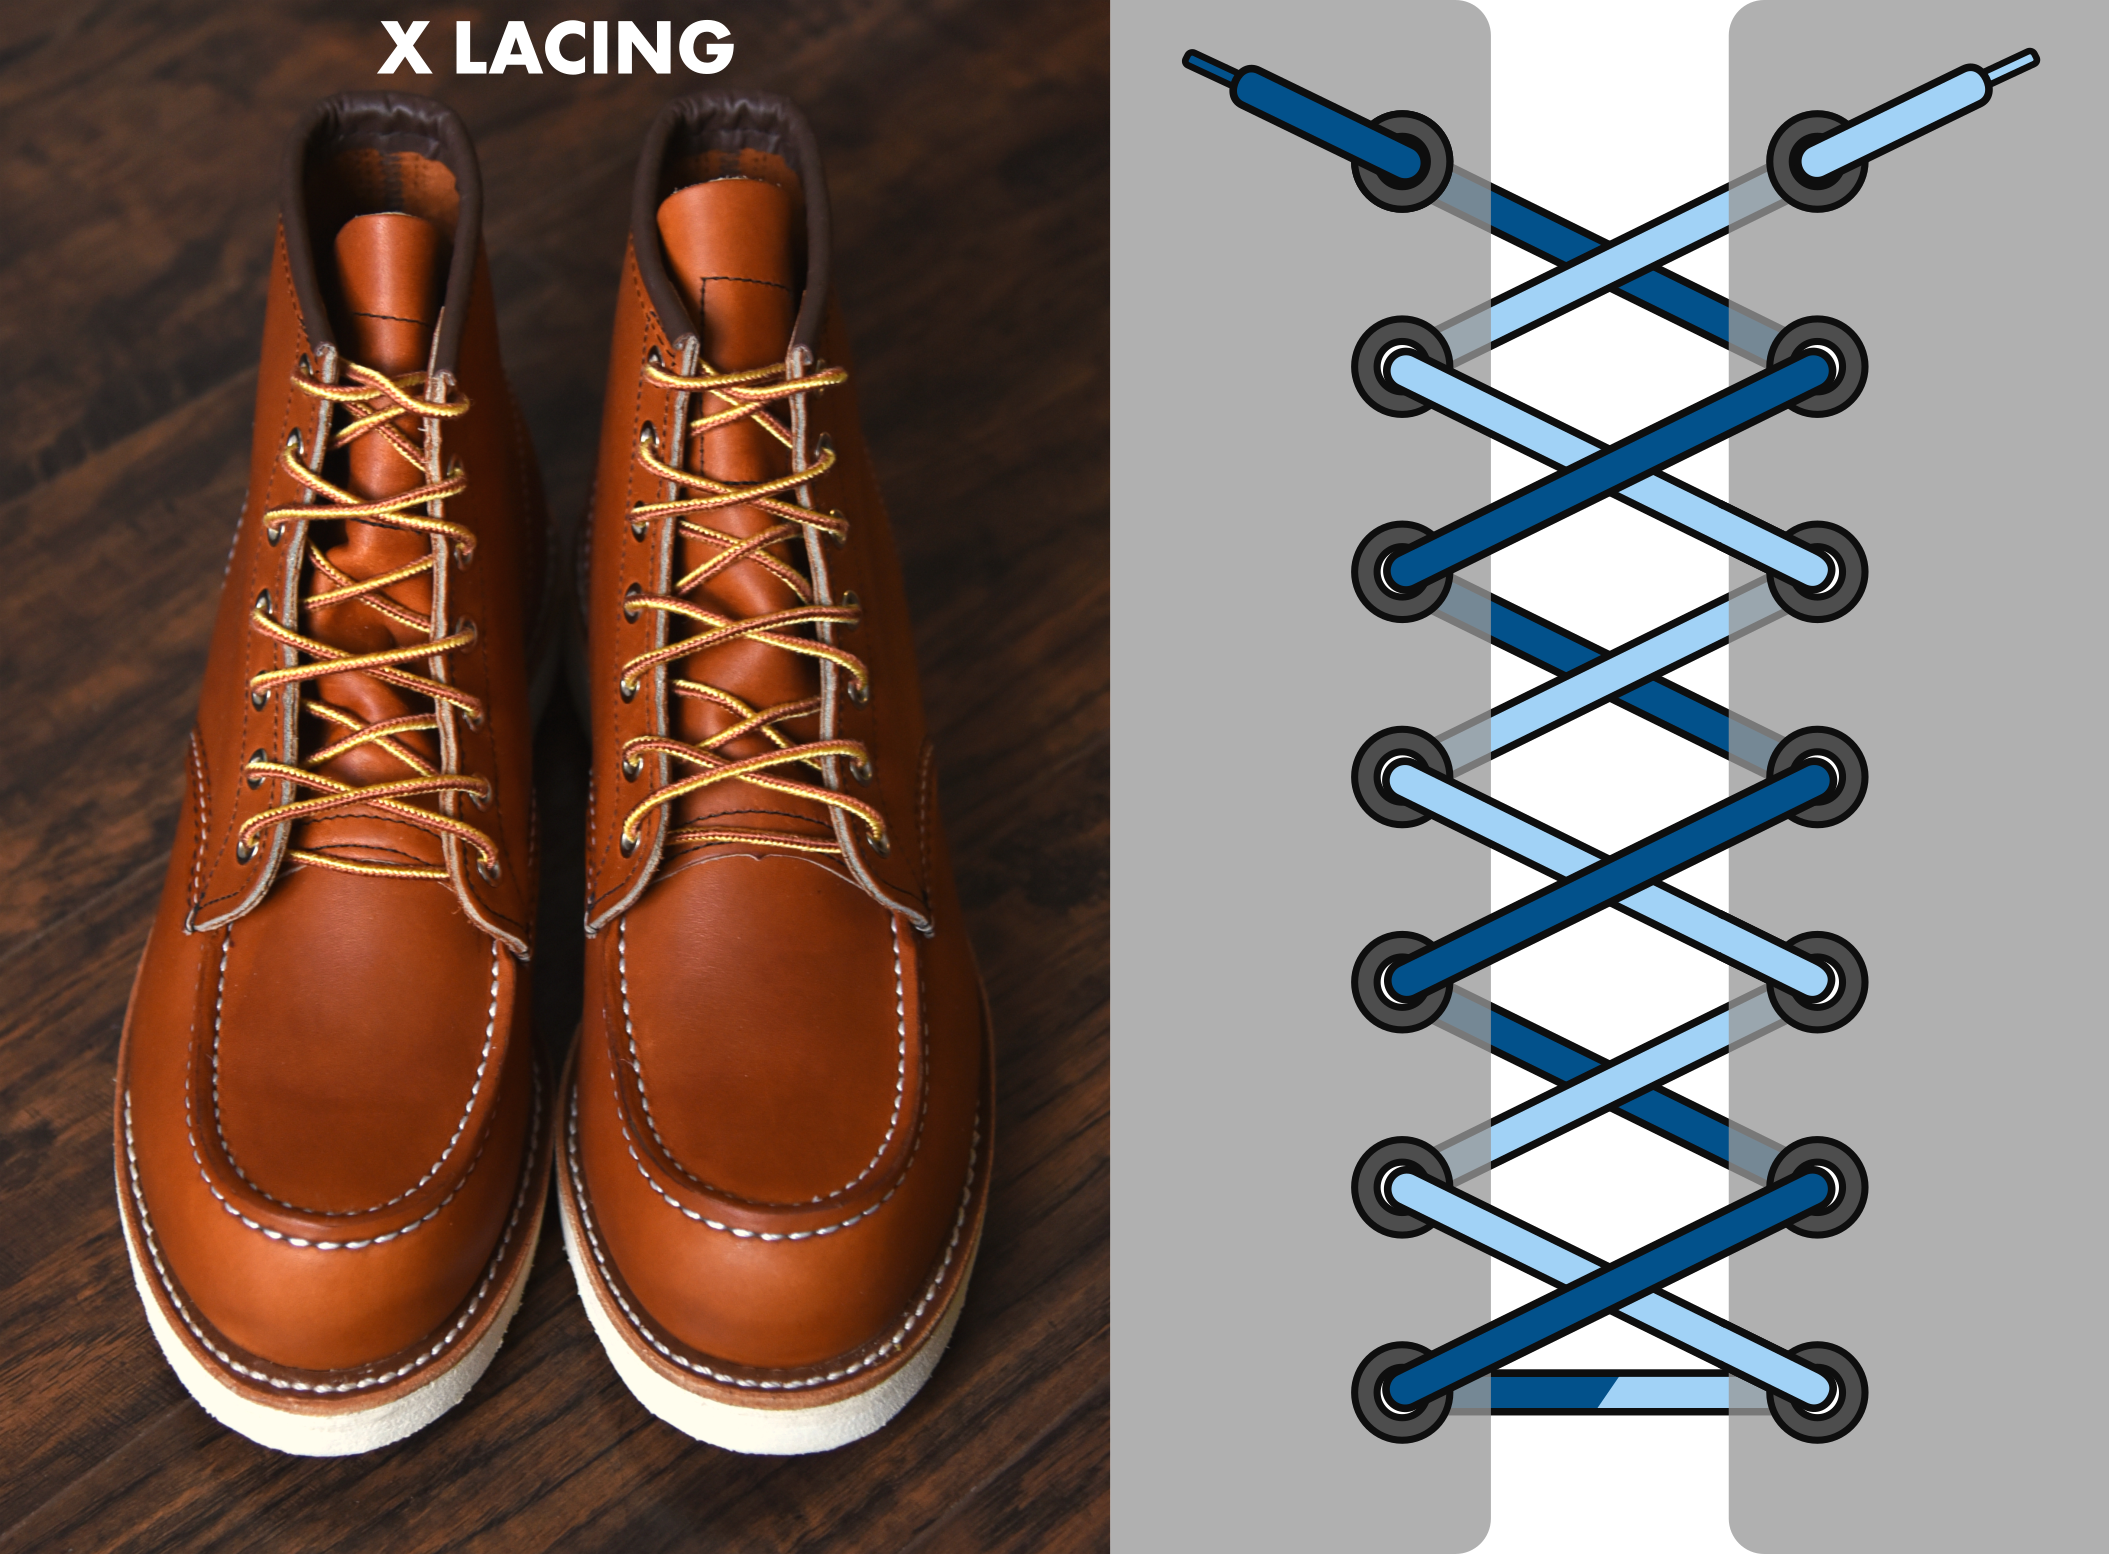
Here’s a variation on the standard criss-cross lacing that’s even easier to adjust, reduces friction on the lace, and offers a slightly different, but wearable look. See the note below if you have an even number of eyelet pairs. If you have an odd number of eyelet pairs, continue to the steps below.
- Start by going underneath the two bottom eyelets and come outward. Make sure the left and right laces are even in length.
- Cross the laces and go through the next eyelet up, outside to inside.
- Cross the laces and go through the next eyelet up again, but this time go from the inside to the outside.
- Keep alternating like this until you get to the top.
Note: if you have an even number of eyelet pairs, start by going straight across the bottom, outside to inside, then cross the laces and go through the next eyelet up, inside to outside. Then, just alternate out-in, in-out, as described above until you get to the top.
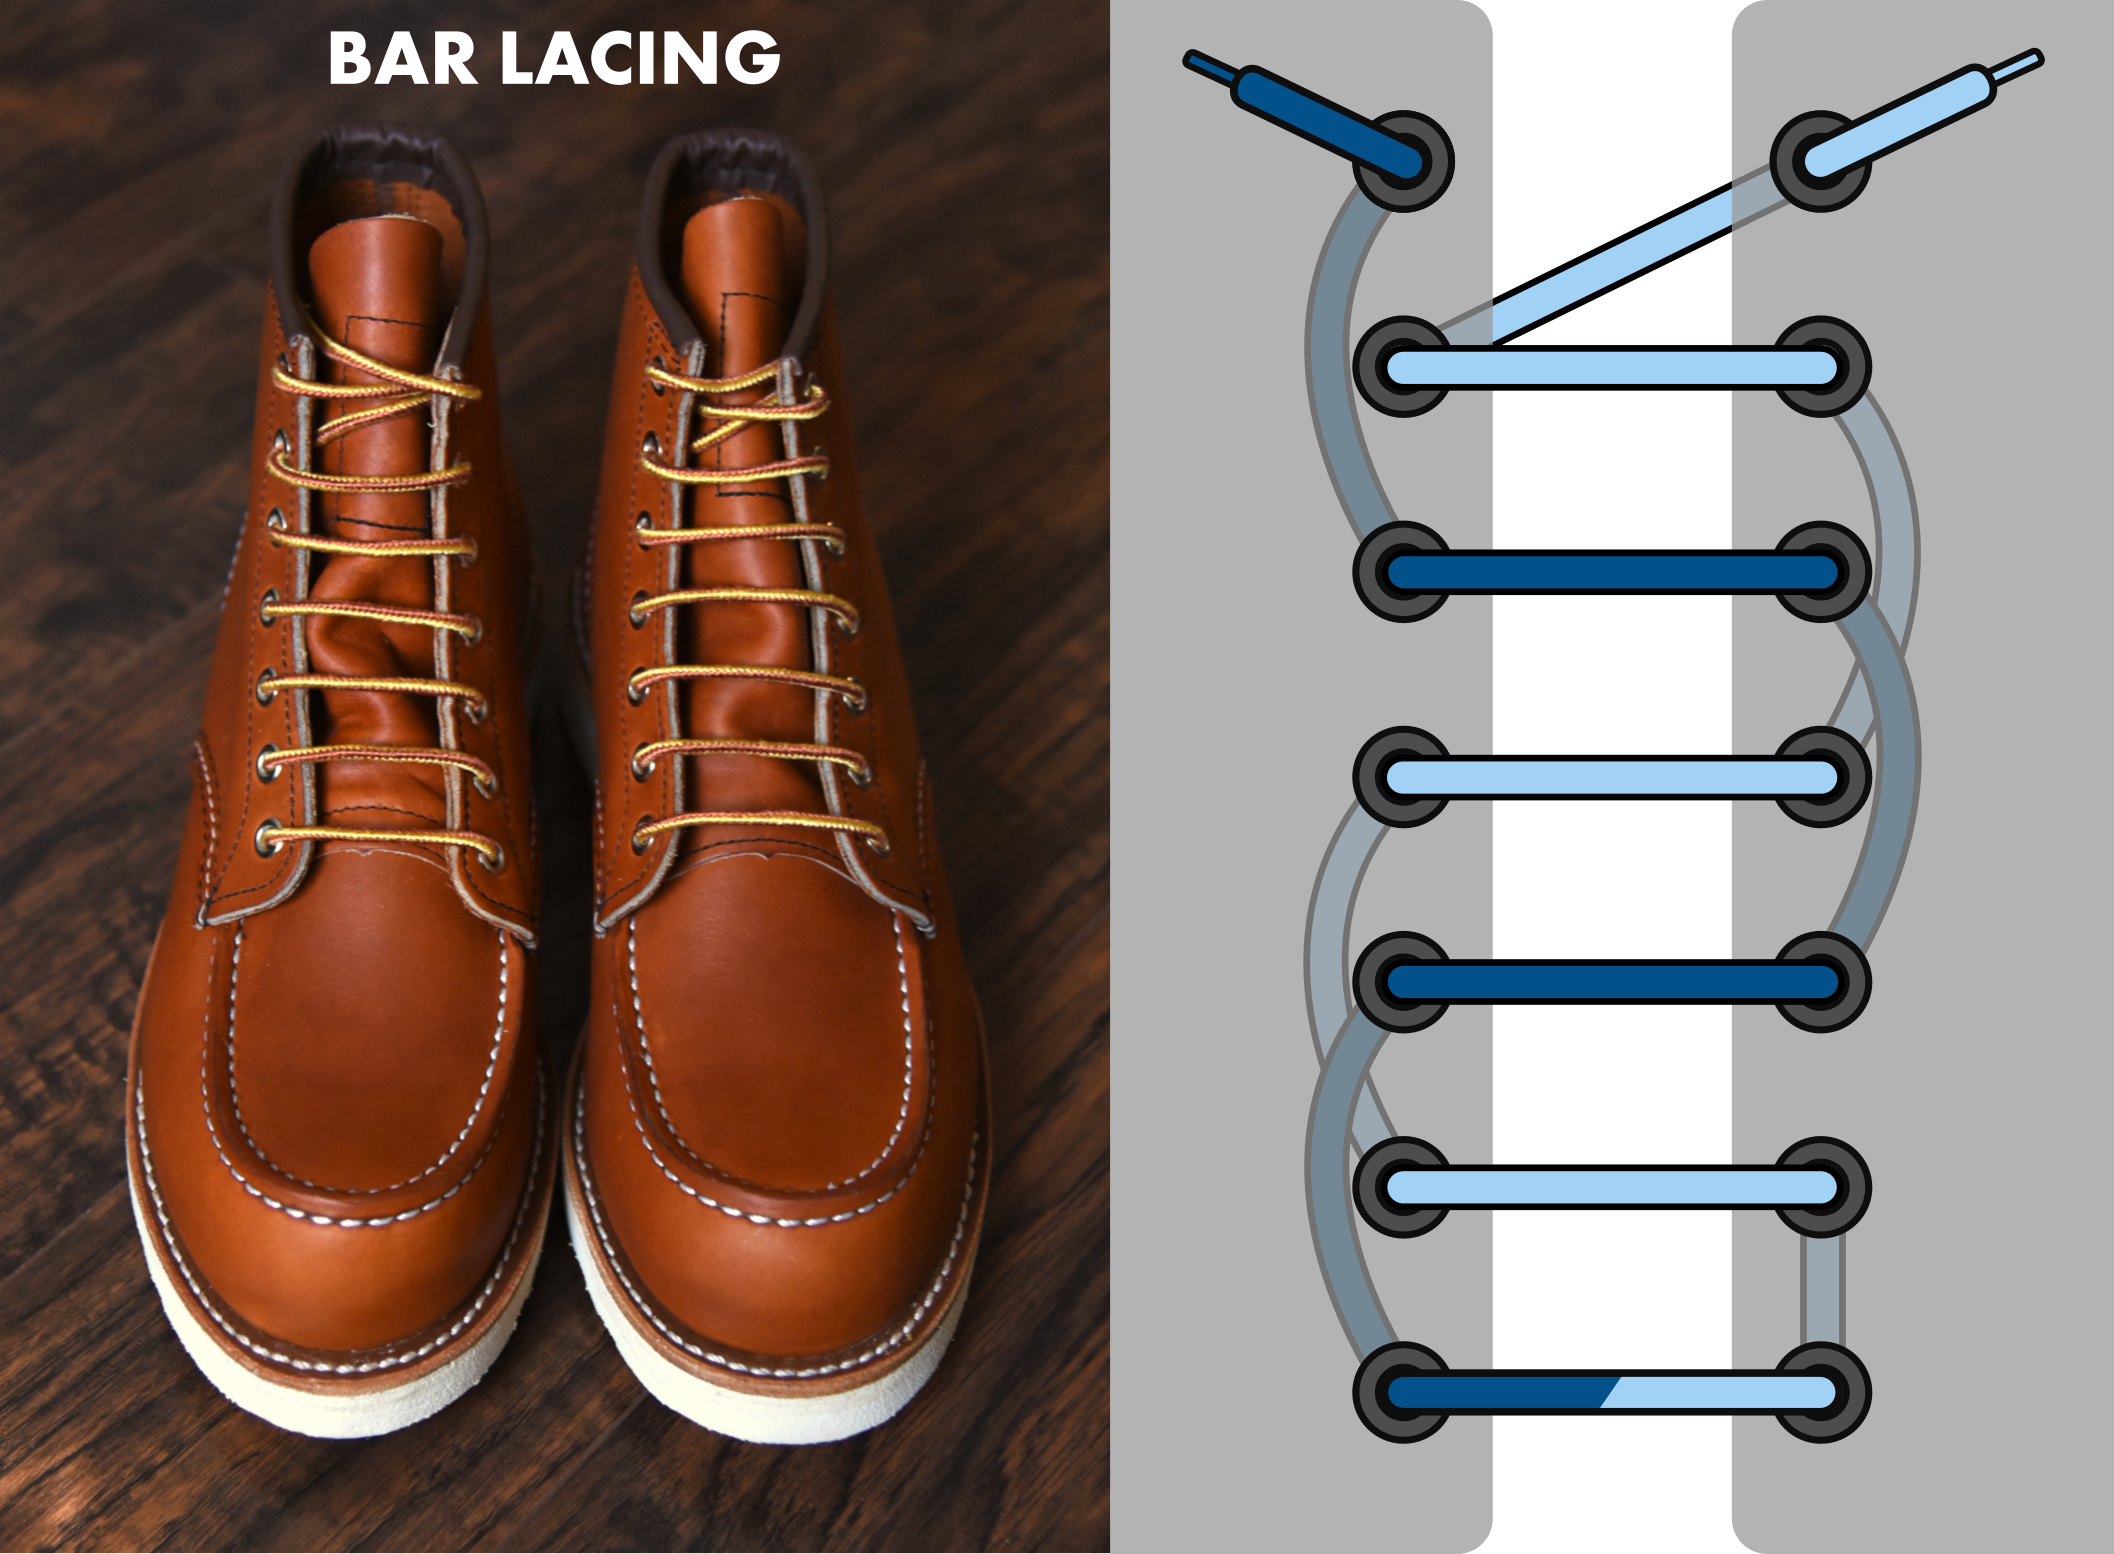
A very clean-looking technique, bar lacing is slightly more difficult to adjust than the previous two.
- Start by going straight across the two bottom eyelets, from outside to inside. Both ends of the lace should be coming out from under the eyelets.
- With the right lace, go straight up to the next eyelet and pull it from the inside to the outside. Then, go through the eyelet directly across to the left, outside to inside.
- With the left lace, go straight up, skipping the eyelet that the right lace is going through, and pull it through the next eyelet, inside to outside. Then, go through the eyelet directly across to the right, outside to inside.
- With the right lace, go straight up, skipping the eyelet that the left lace is going through, and pull it through the next eyelet, inside to outside. Then, go through the eyelet directly across to the left, outside to inside.
- Repeat steps 3 and 4 until you get to the top. If you have an even number of eyelet pairs, you can go right to the top with no problem. If you have an odd number, you’ll get to a point where you can’t continue the pattern. When this happens, cross the lace and go through the next eyelet up, inside to outside (see diagram for example). This cross will hardly be visible once the shoes are tied up, keeping the intended clean look.
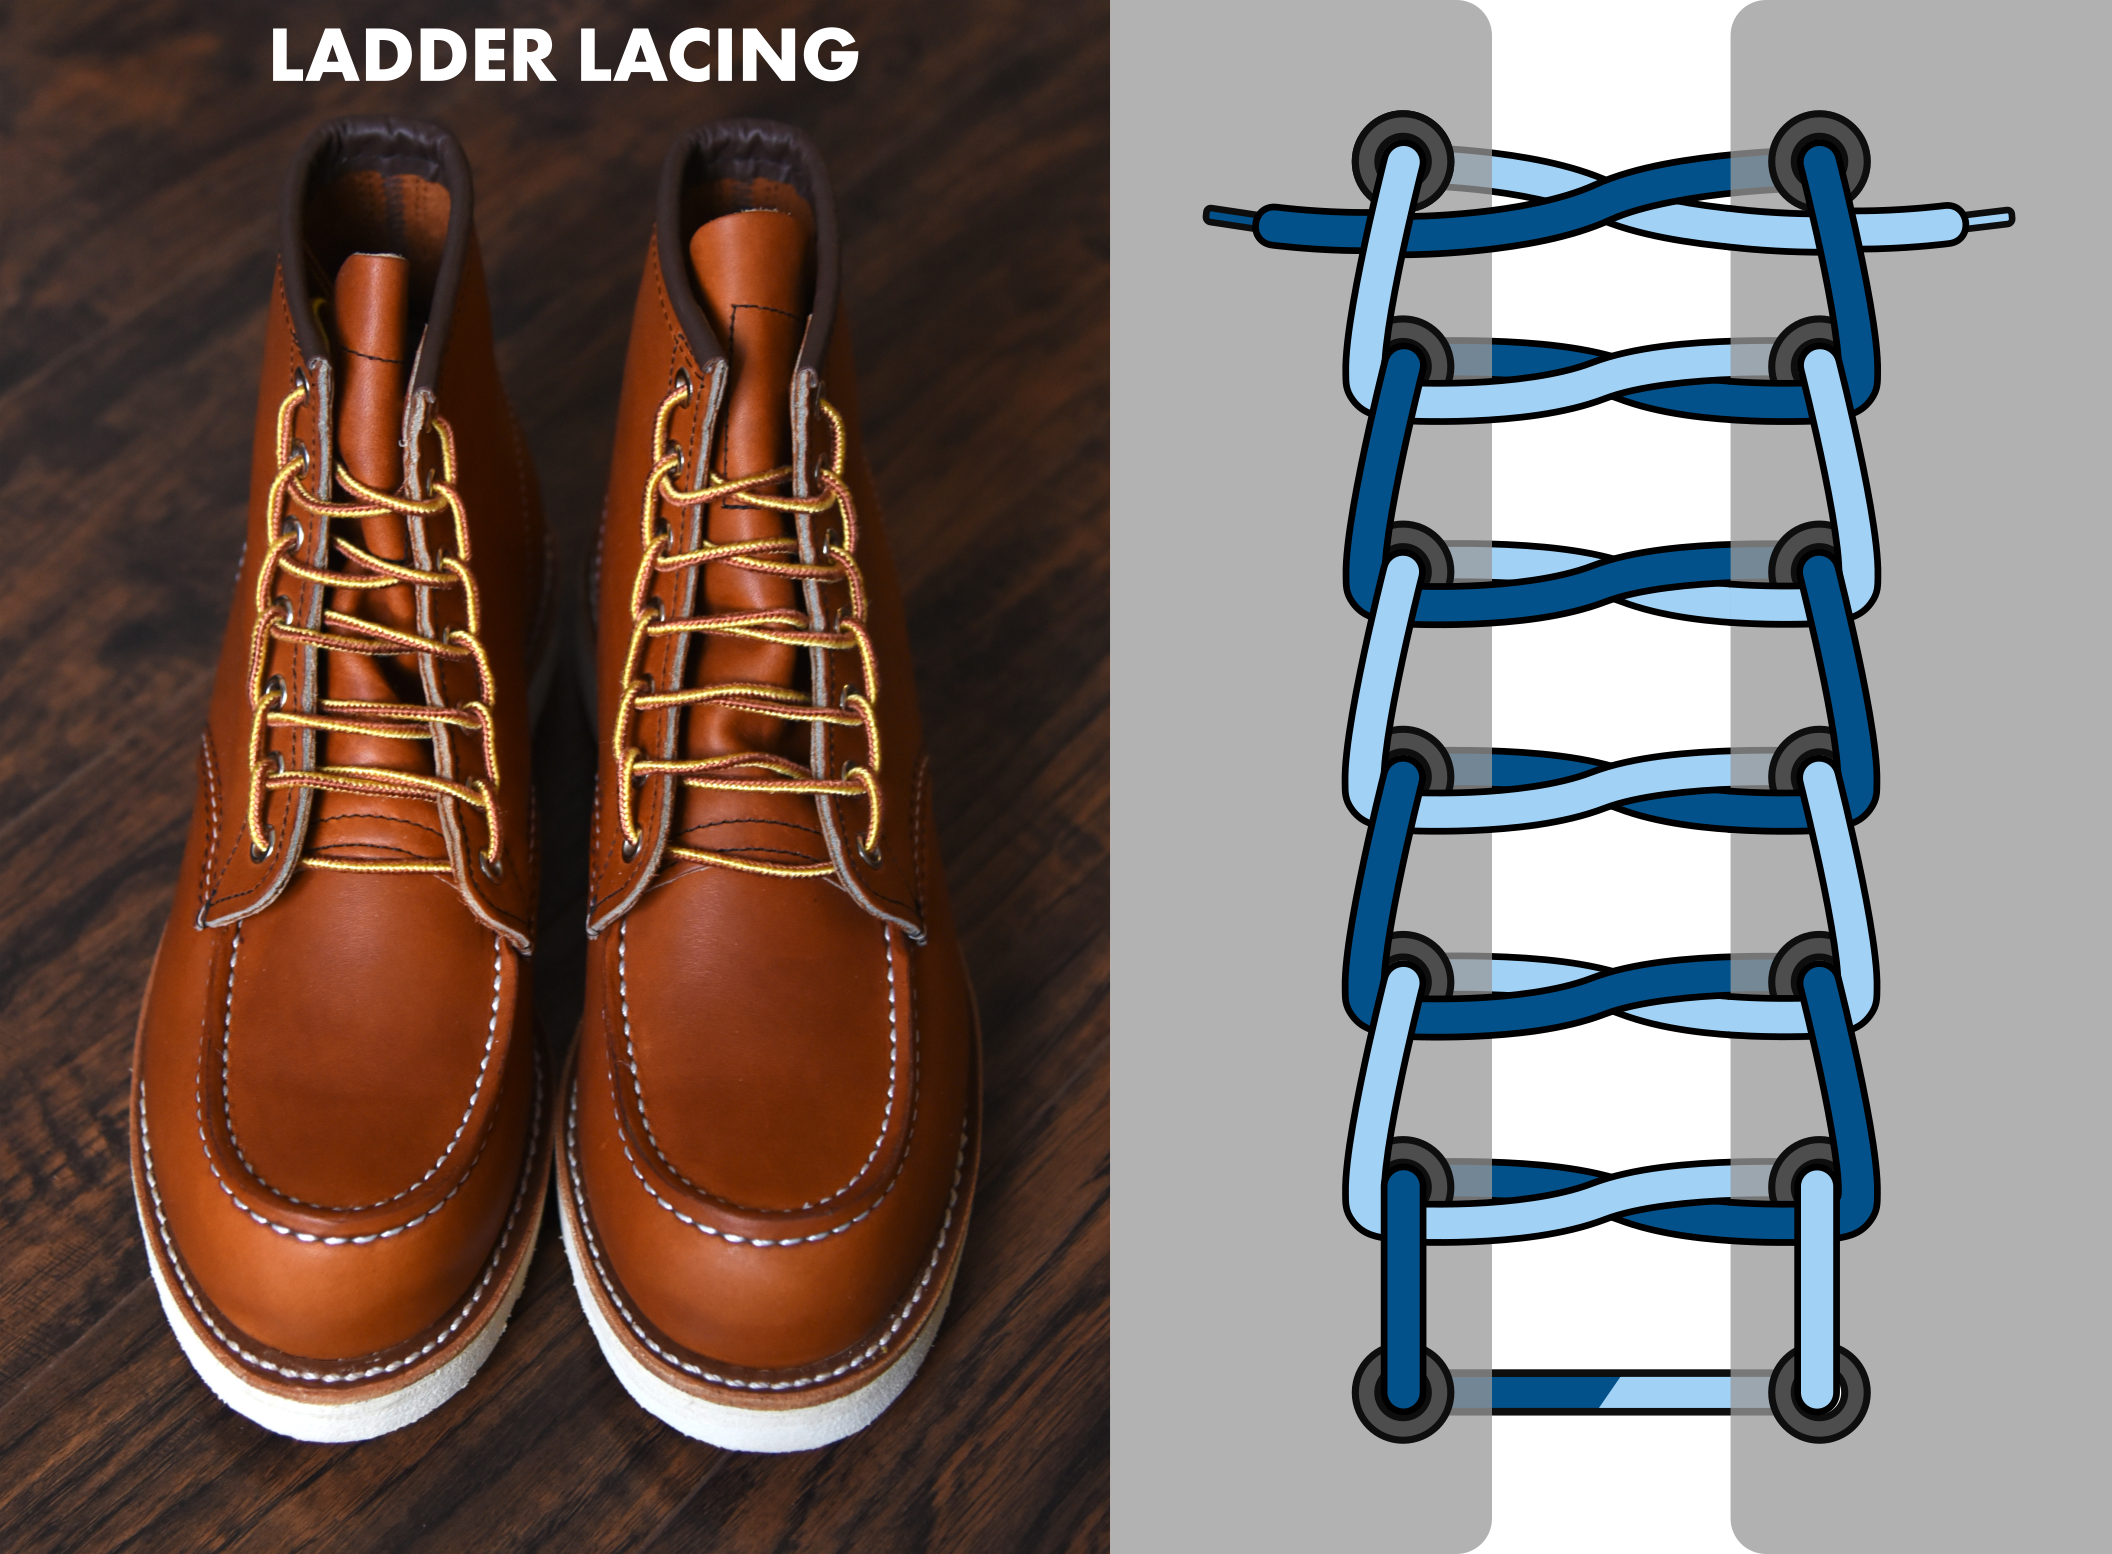
This style of lacing is mainly used on tall military boots and favored by paratroopers for the support that it offers. The ladder-like appearance helps lock the lace in place, which is good if you don’t want your laces to loosen over the course of the day, but not good if you want to tighten up your laces quickly and efficiently.
- Start by going underneath the two bottom eyelets and come outward. Make sure the left and right laces are even in length.
- Take your right lace and go straight up through the eyelet directly above, outside to inside. Don’t pull too much; keep it loose for now. Repeat for the left lace.
- Take your right lace and go straight across to the left, going underneath the left lace that is bridging the gap between first two eyelets. Then, run that same lace through the next eyelet up, outside to inside.
- Repeat for the left lace. Take it straight across to the right, under the right lace, then through the next eyelet up, outside to inside.
- Repeat steps 4 and 5 until you get to the top.
If you've just picked up a new pair of boots, now is the perfect time to try a new lacing technique while you break them in. Alternatively, if have a pair of old-faithfuls that's been on your shoe rack for years, a fresh lace-up might be just the thing to kick them back into gear. Either way, having a few different lacing methods in your arsenal is a nice, subtle way to elevate the details of any outfit.